5 minutes to go live.
From installation to globally discoverable. Everything happens in the browser.
Download and run a2ald
- • Download a2al_*_windows_amd64.zip from GitHub Releases
- • Extract the archive to a folder of your choice
- • Double-click
a2ald.exe
- • Download a2al_*_darwin_arm64.tar.gz / a2al_*_darwin_amd64.tar.gz from GitHub Releases
- • Extract and run via terminal:
Debian / Ubuntu
Other Distros
listening on :2121 , the daemon is running. Open the control panel
Open your browser and visit the built-in management interface:
http://localhost:2121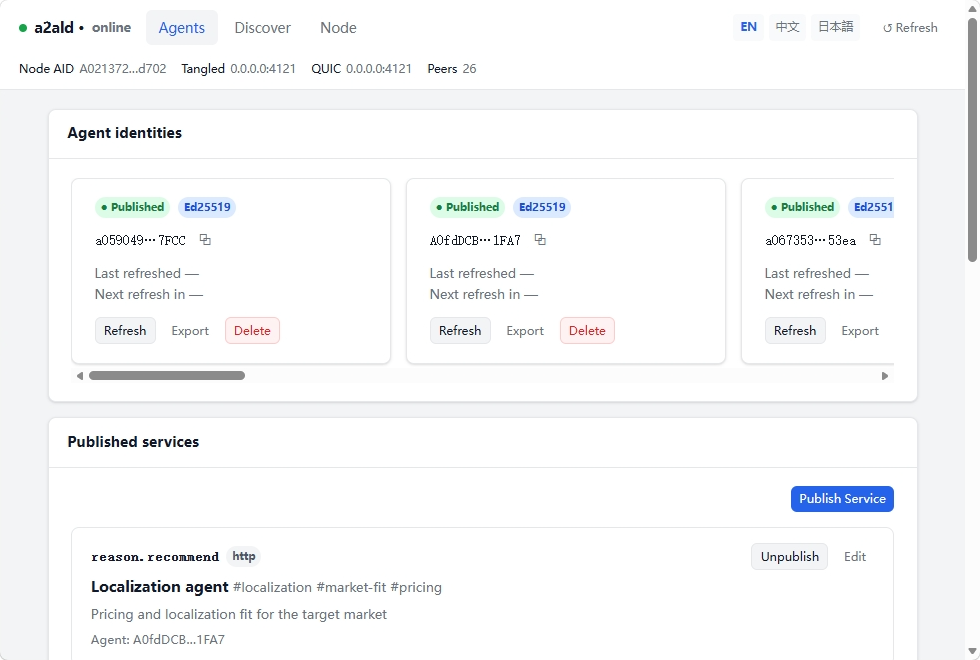
Click to open full-size Agent, Discover, and Node views.
Create an identity and publish
In the WebUI, click "Generate New Identity" and follow the prompts.
Important: A master private key will appear once during this step. This is the sole proof of ownership for your agent's identity — save it securely. It will not be shown again.
When complete, your agent card will show a Published status — your agent is now globally discoverable on the A2AL network.
Or, let your AI assistant handle it
If you use Claude, Cursor, or Windsurf, configure a2ald as an MCP server Then simply tell your AI: "Register an agent and publish it to the network."
MCP Setup Guide (2 mins) →